Steps to build Task Management app with NextAppFast:
- Identify and Create Models
- Create UI by adding Route
- Preview running app
- Download codebase and run it locally
Contents
- Introduction
- Creating the Application
- Defining the Models
- Configuring the User Interface
- Configuring the Routes
- Testing the Application
- Conclusion
Introduction
In this tutorial, we will walk through the step-by-step process of building a simple task management application, called TaskFast using the NextAppFast platform. The app will allow users to create and manage multiple projects, and within each project, they can create and track tasks with different status levels, such as Open, Planned, In Progress, and Done.
Creating the Application
Create App UI
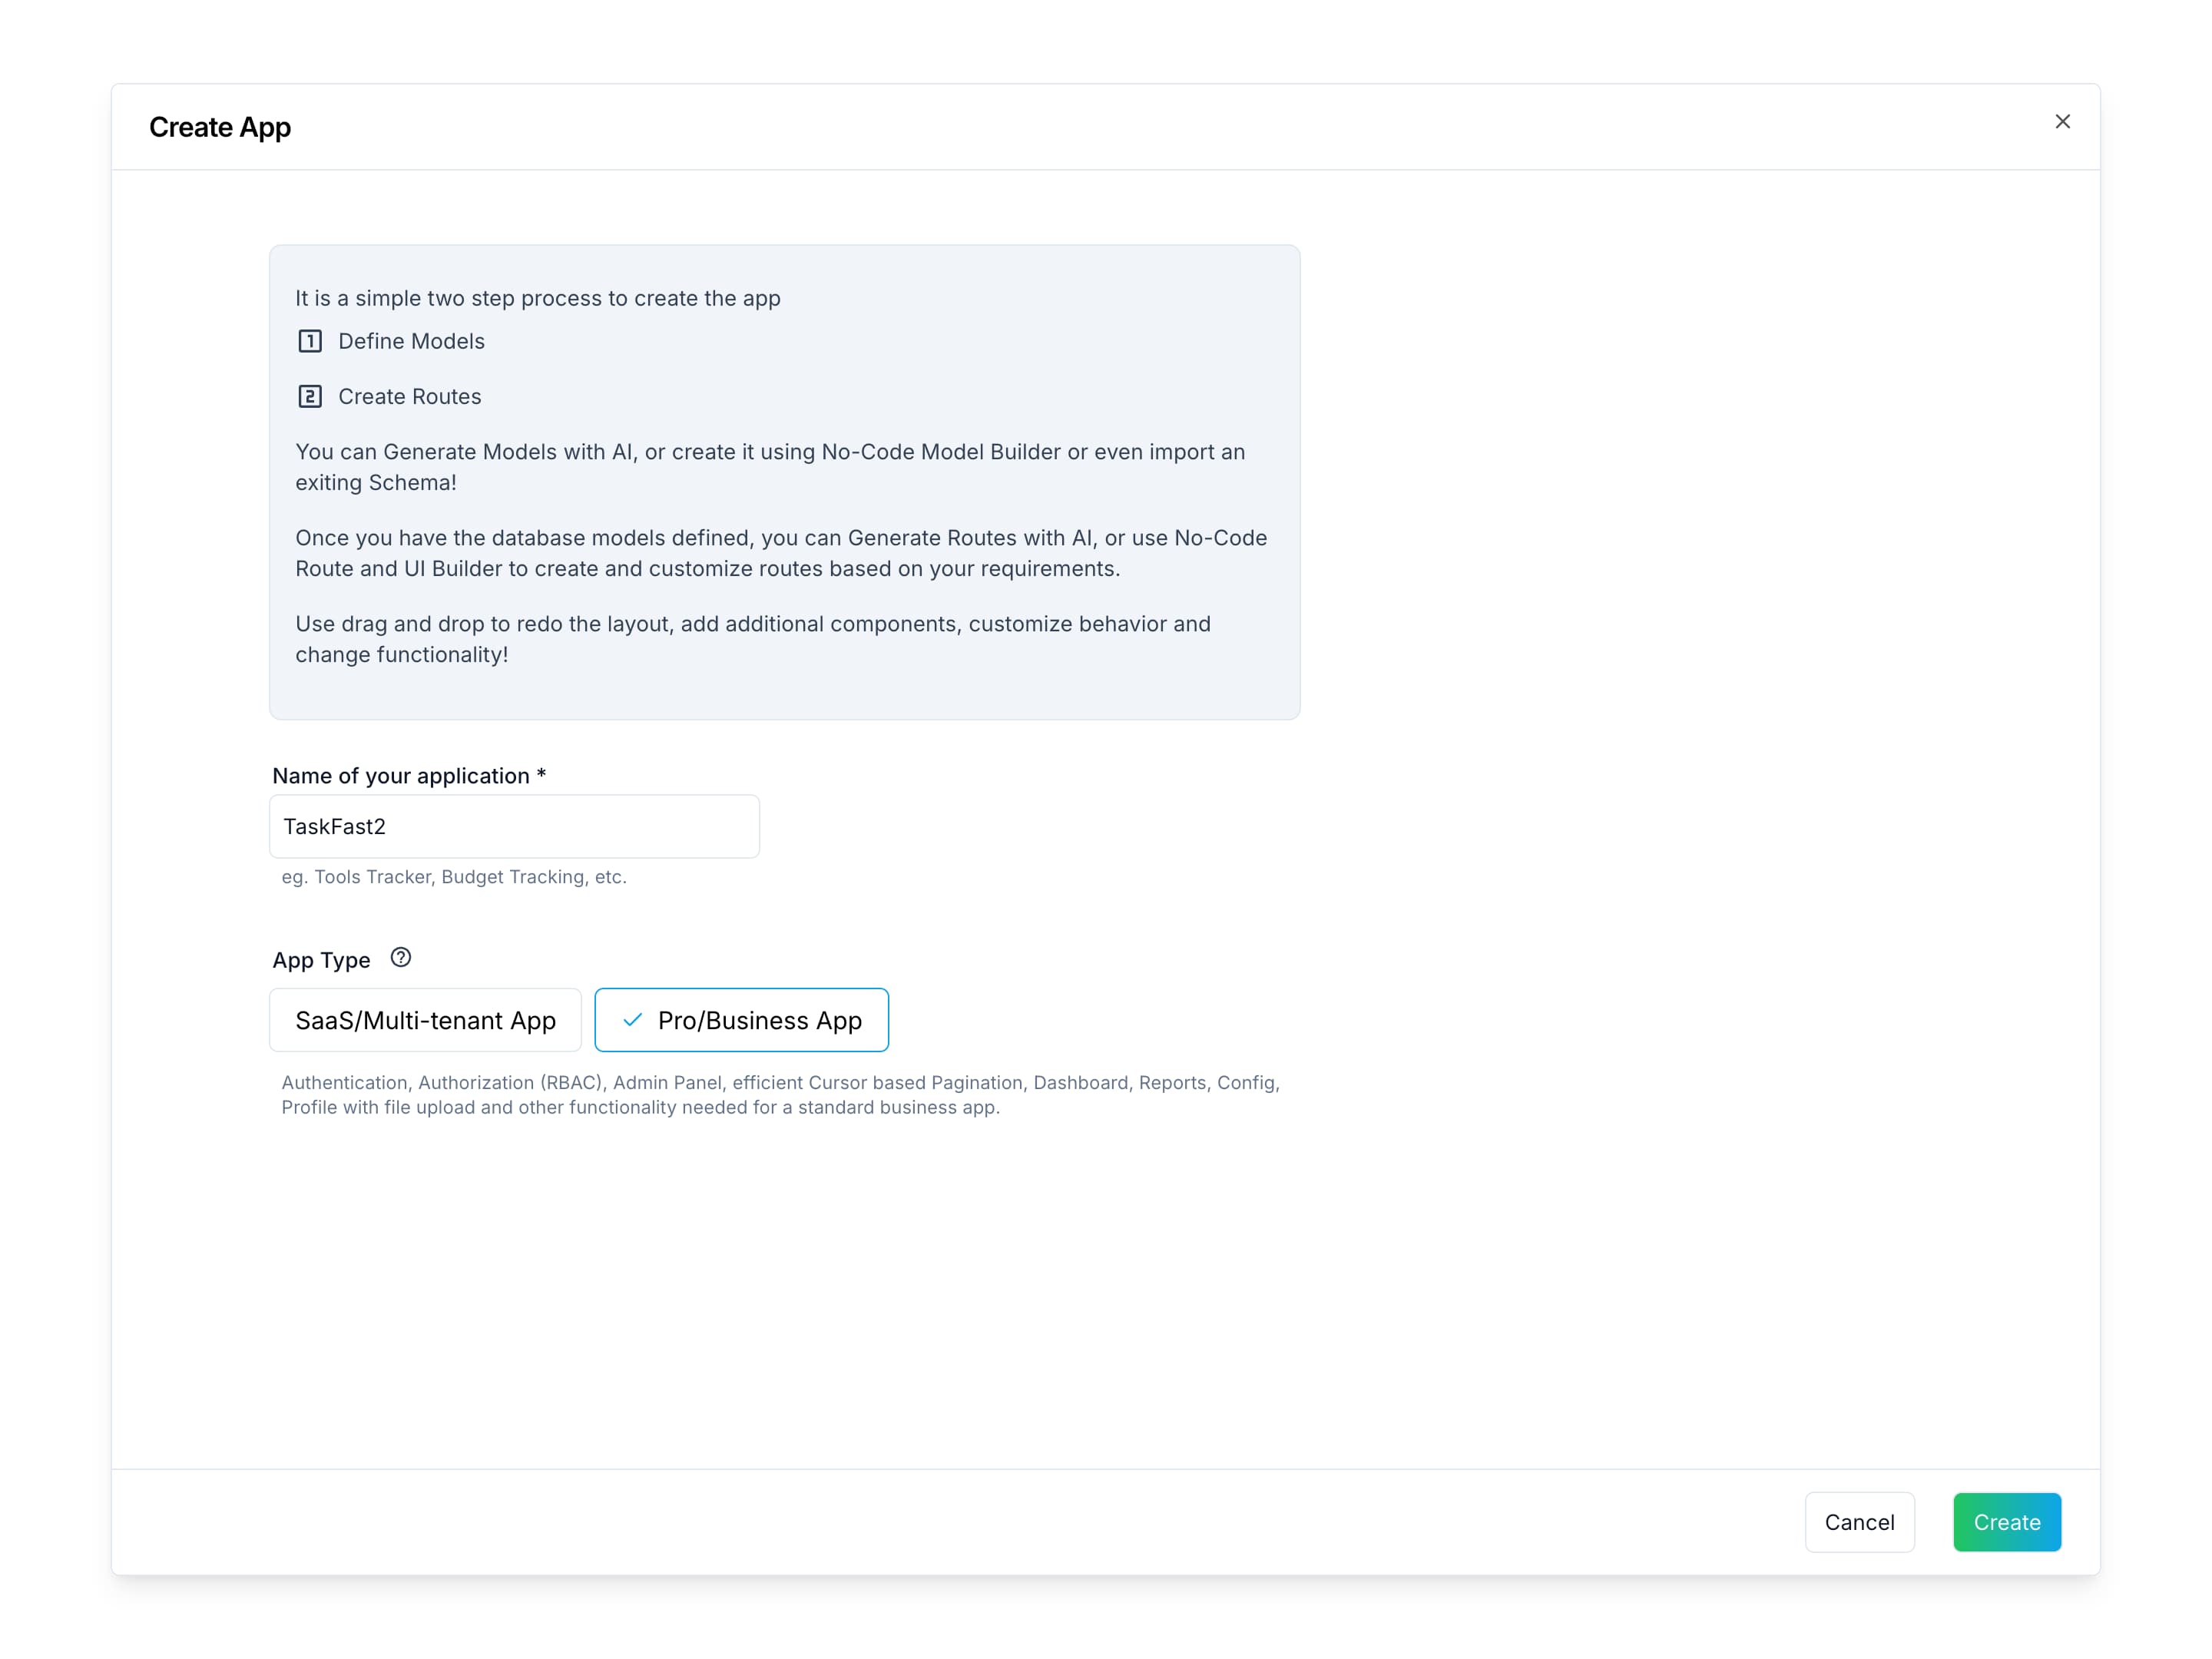
- On the
Buildertab, click+ Create Appand enter the following details in the Create App dialog:- Name of your application:
TaskFast - App Type:
Internal Tool/Business App
- Name of your application:
- Click
Createto generate the starter project with the basic tables, user, password, role, right, roleRight, and userRole.
Defining the Models
Project Model
Add Model UI

- Click on
Add Modeland enter the following details in the Add Model dialog:- Model Name:
Project - Add Audit Columns:
Check - Add two fields:
projectNameprojectDescription
- Model Name:
- Click
Saveto create the project table.
Task Model
Add Model UI
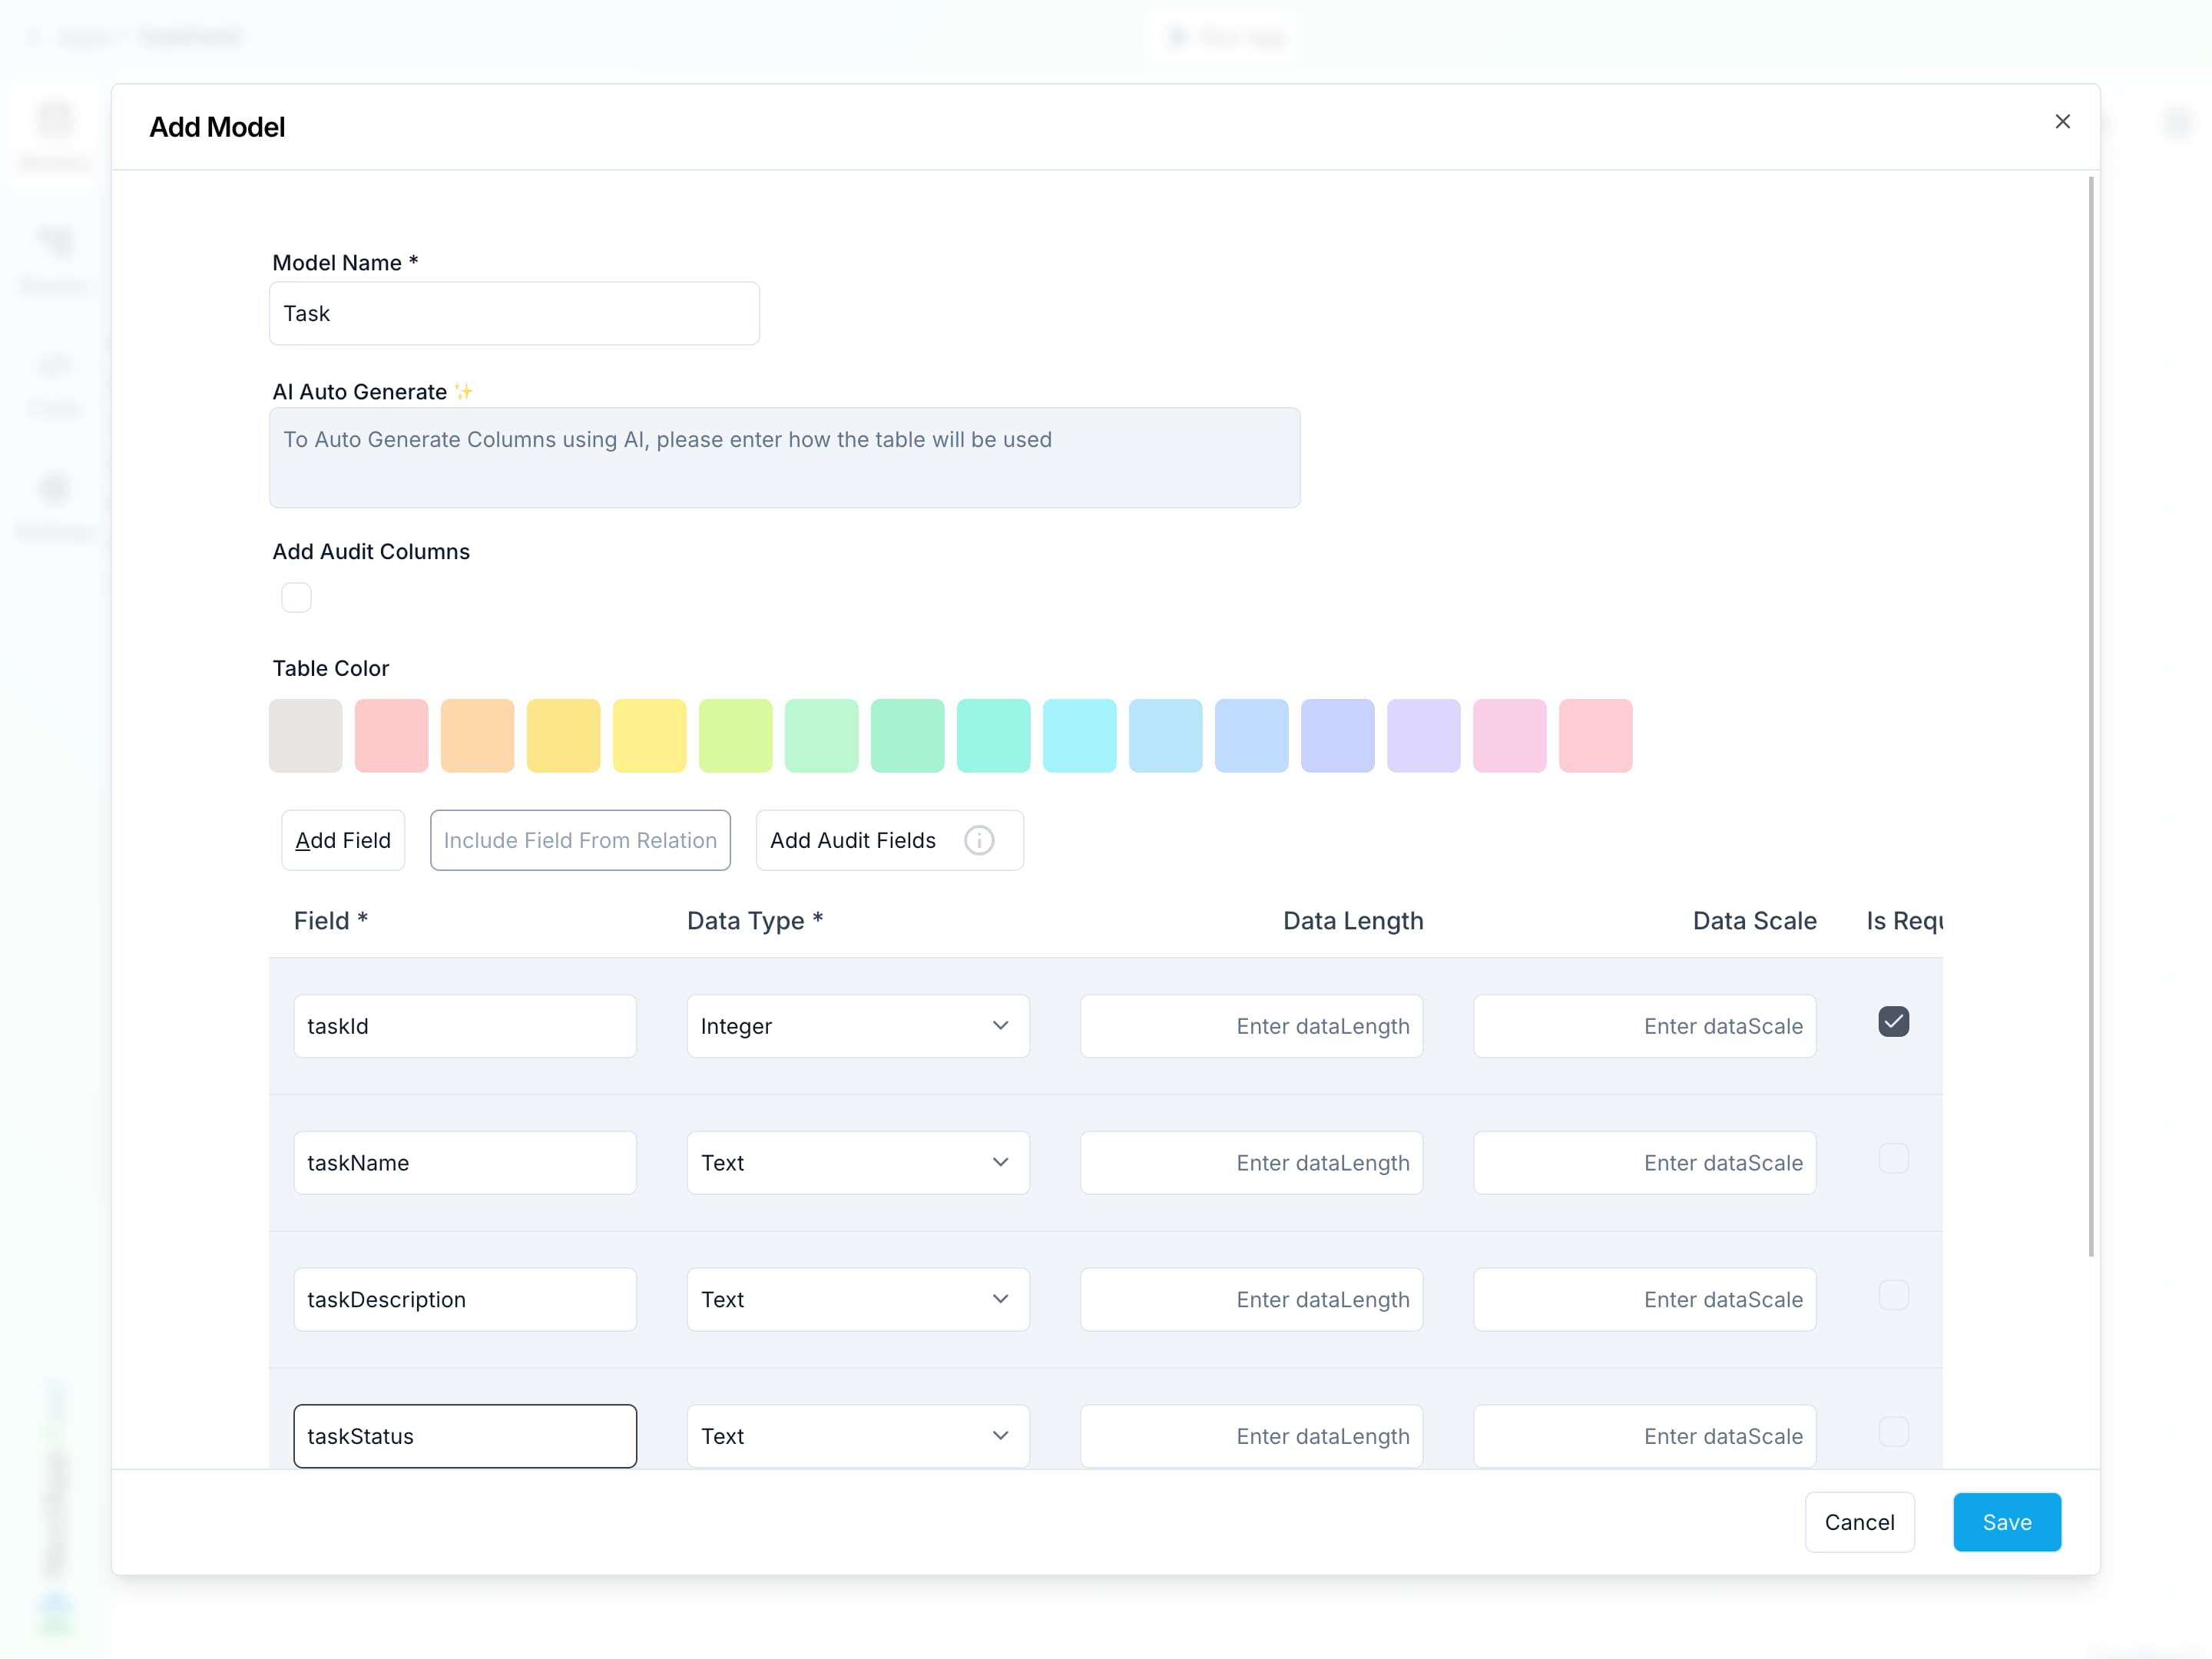
-
Click on
Add Modeland enter the following details in the Add Model dialog:- Model Name:
Task - Add three fields:
taskNametaskDescriptiontaskStatus
- Model Name:
-
Click
Saveto create the task table. -
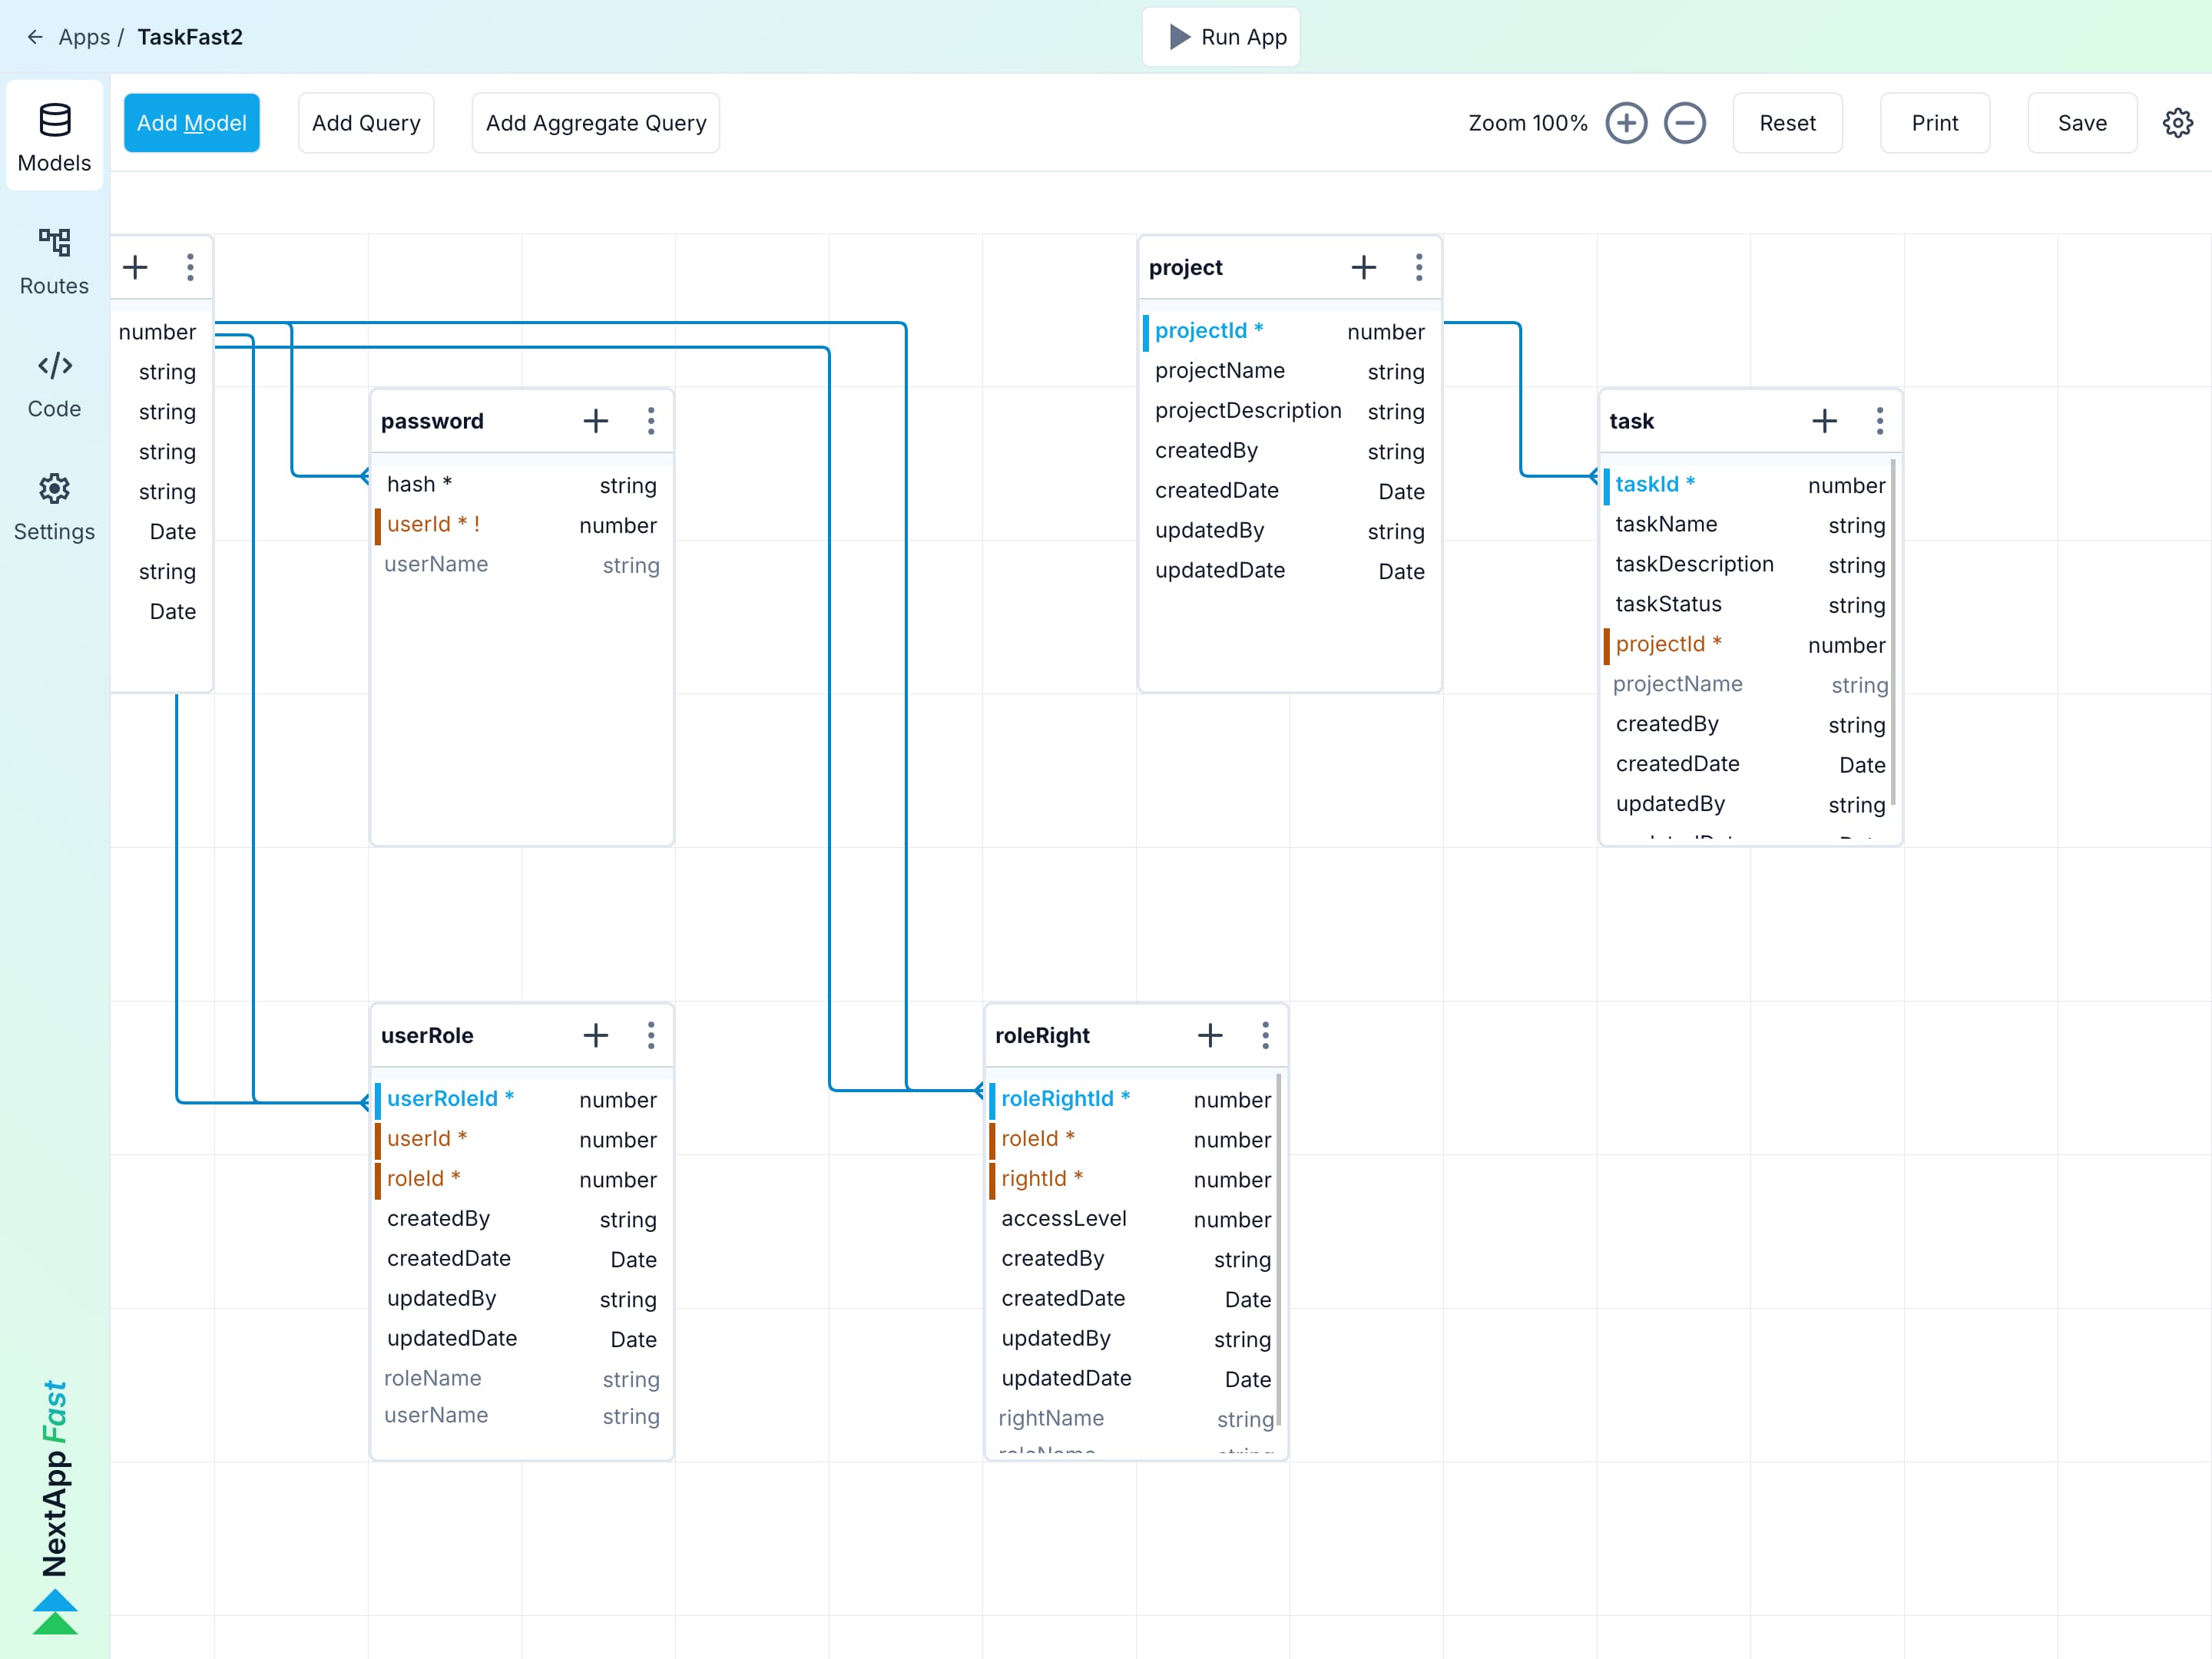
Establish the relationship between the project and task tables by
draggingthetaskIdfield from the task table anddroppingit onto the project table. This will create a one-to-many relationship, where a single project can have multiple tasks. -
Add Audit Fields to the task table by clicking on the
⋮more menu on the task table and selecting+ Audit Fields. This will create four audit fields to track who created the record, when it was created, who last updated the record, and when.
Final Model UI
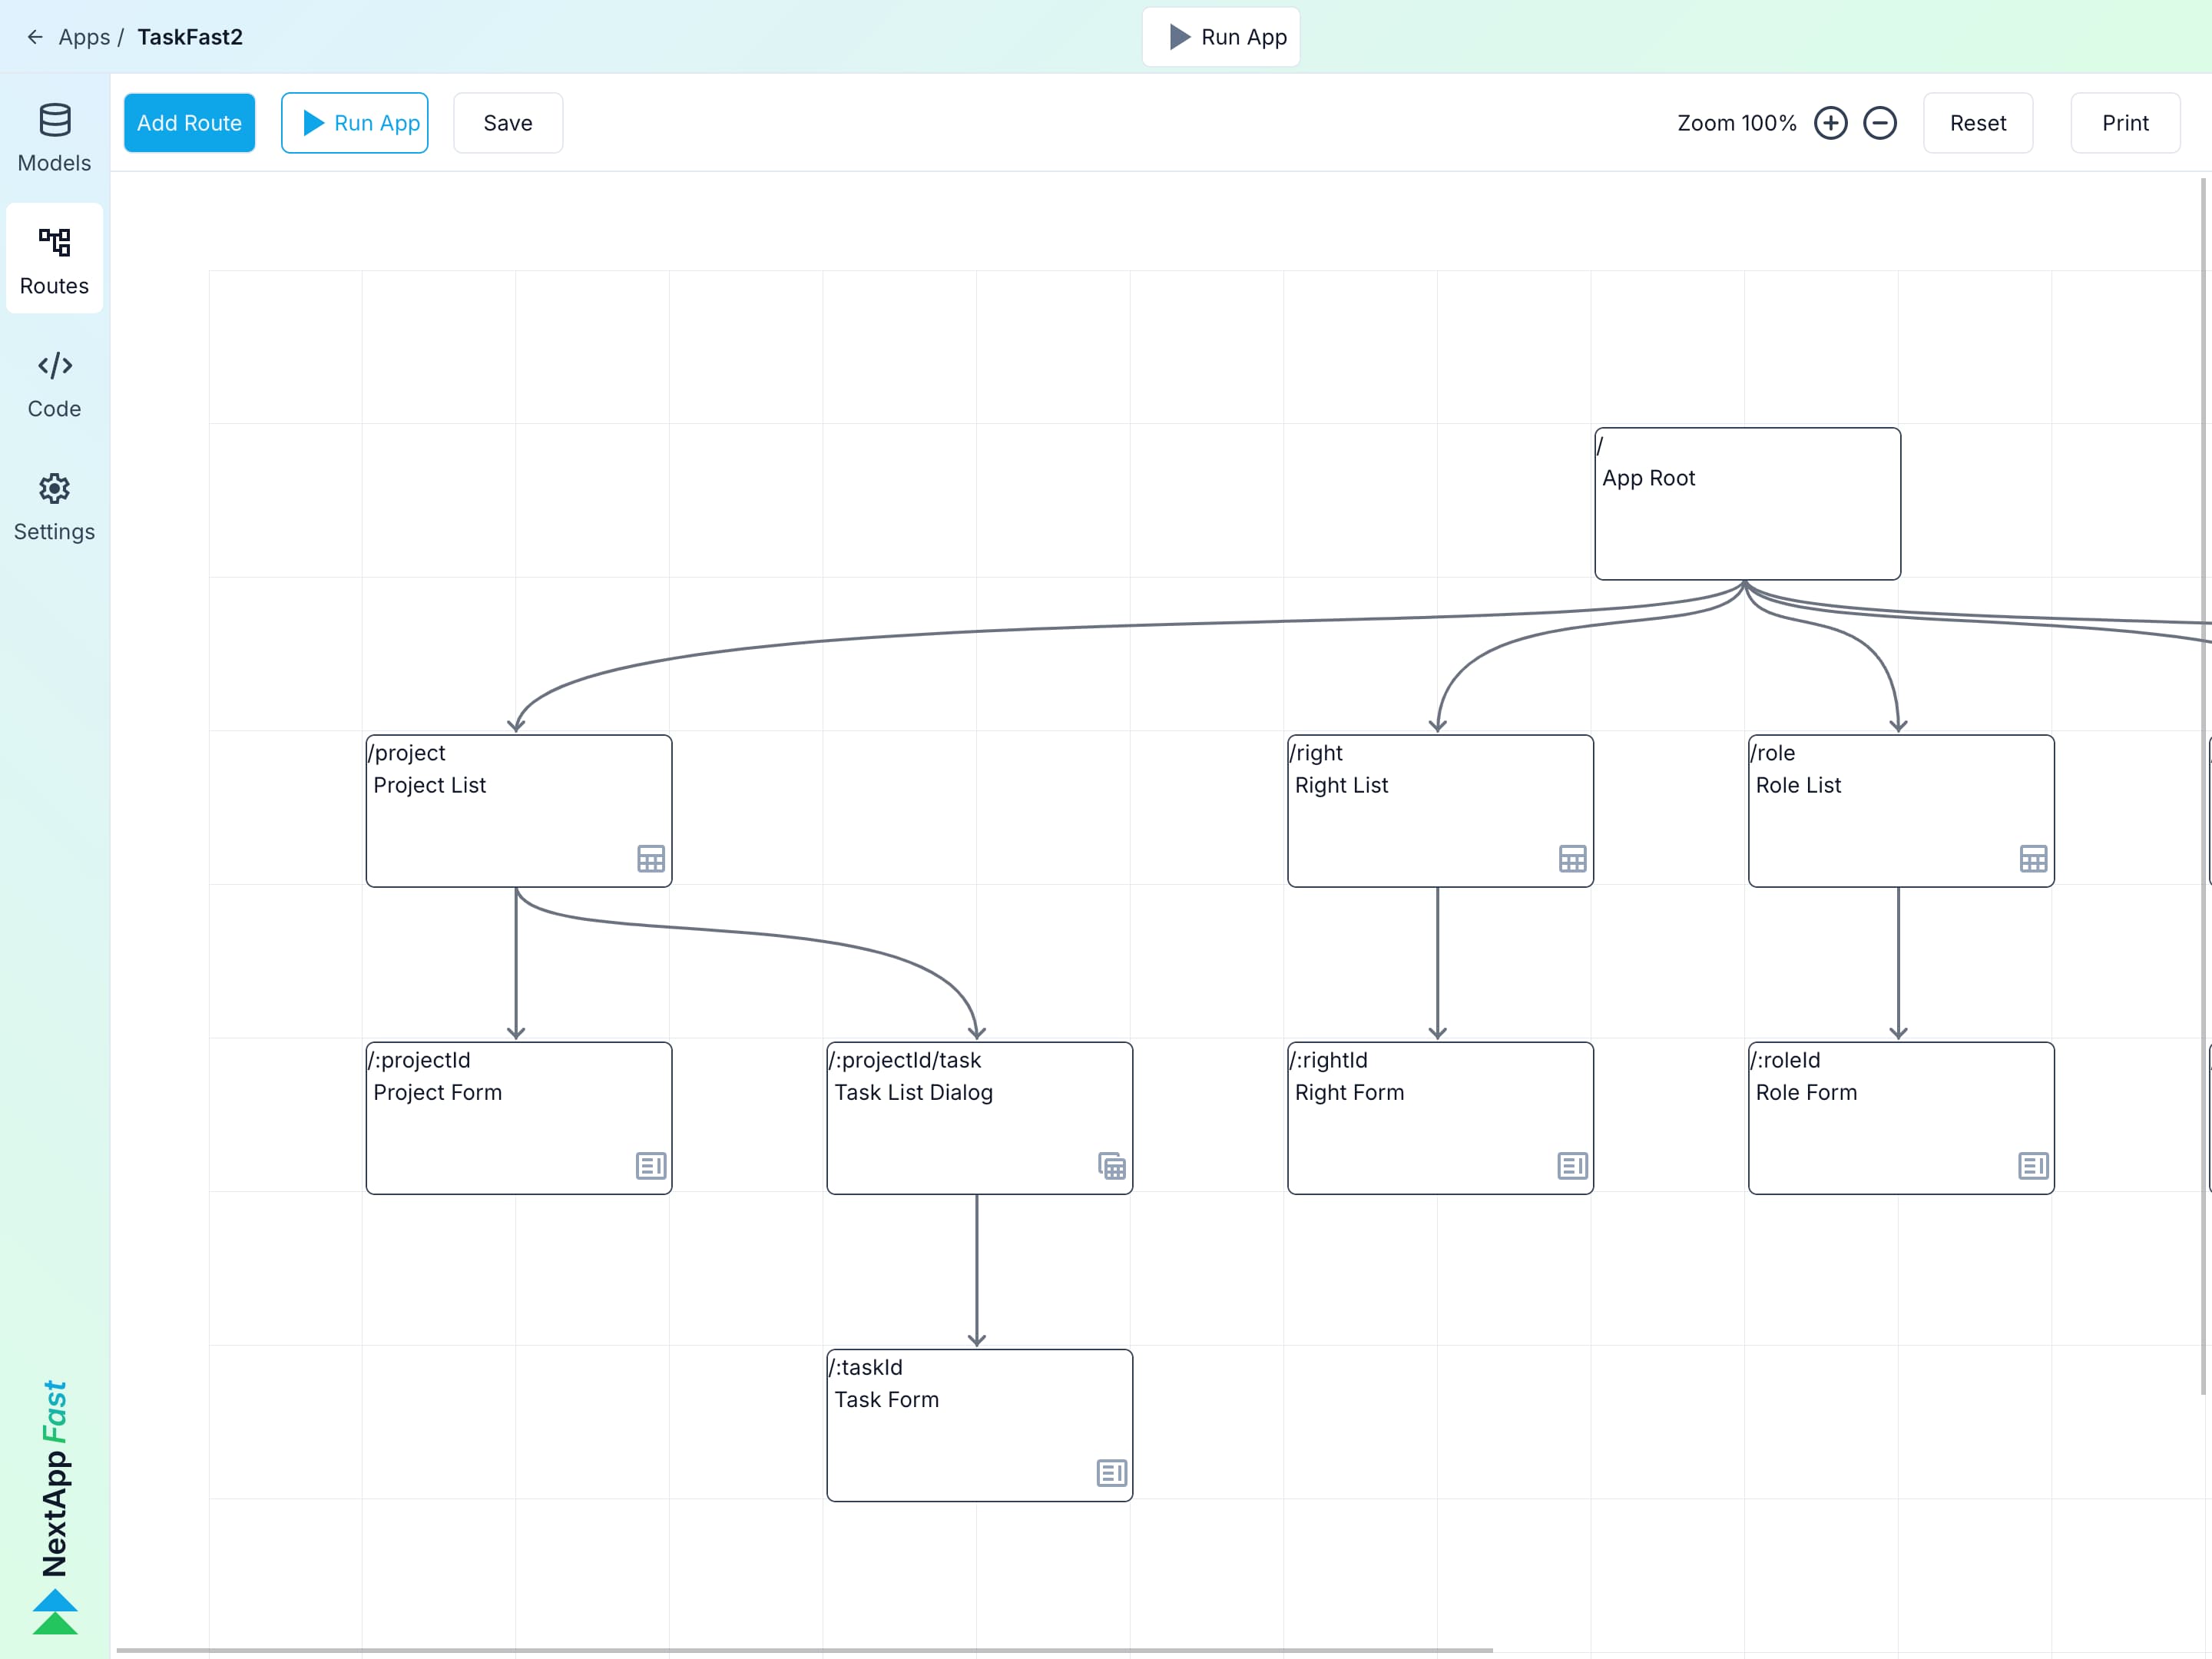
Configuring the Routes
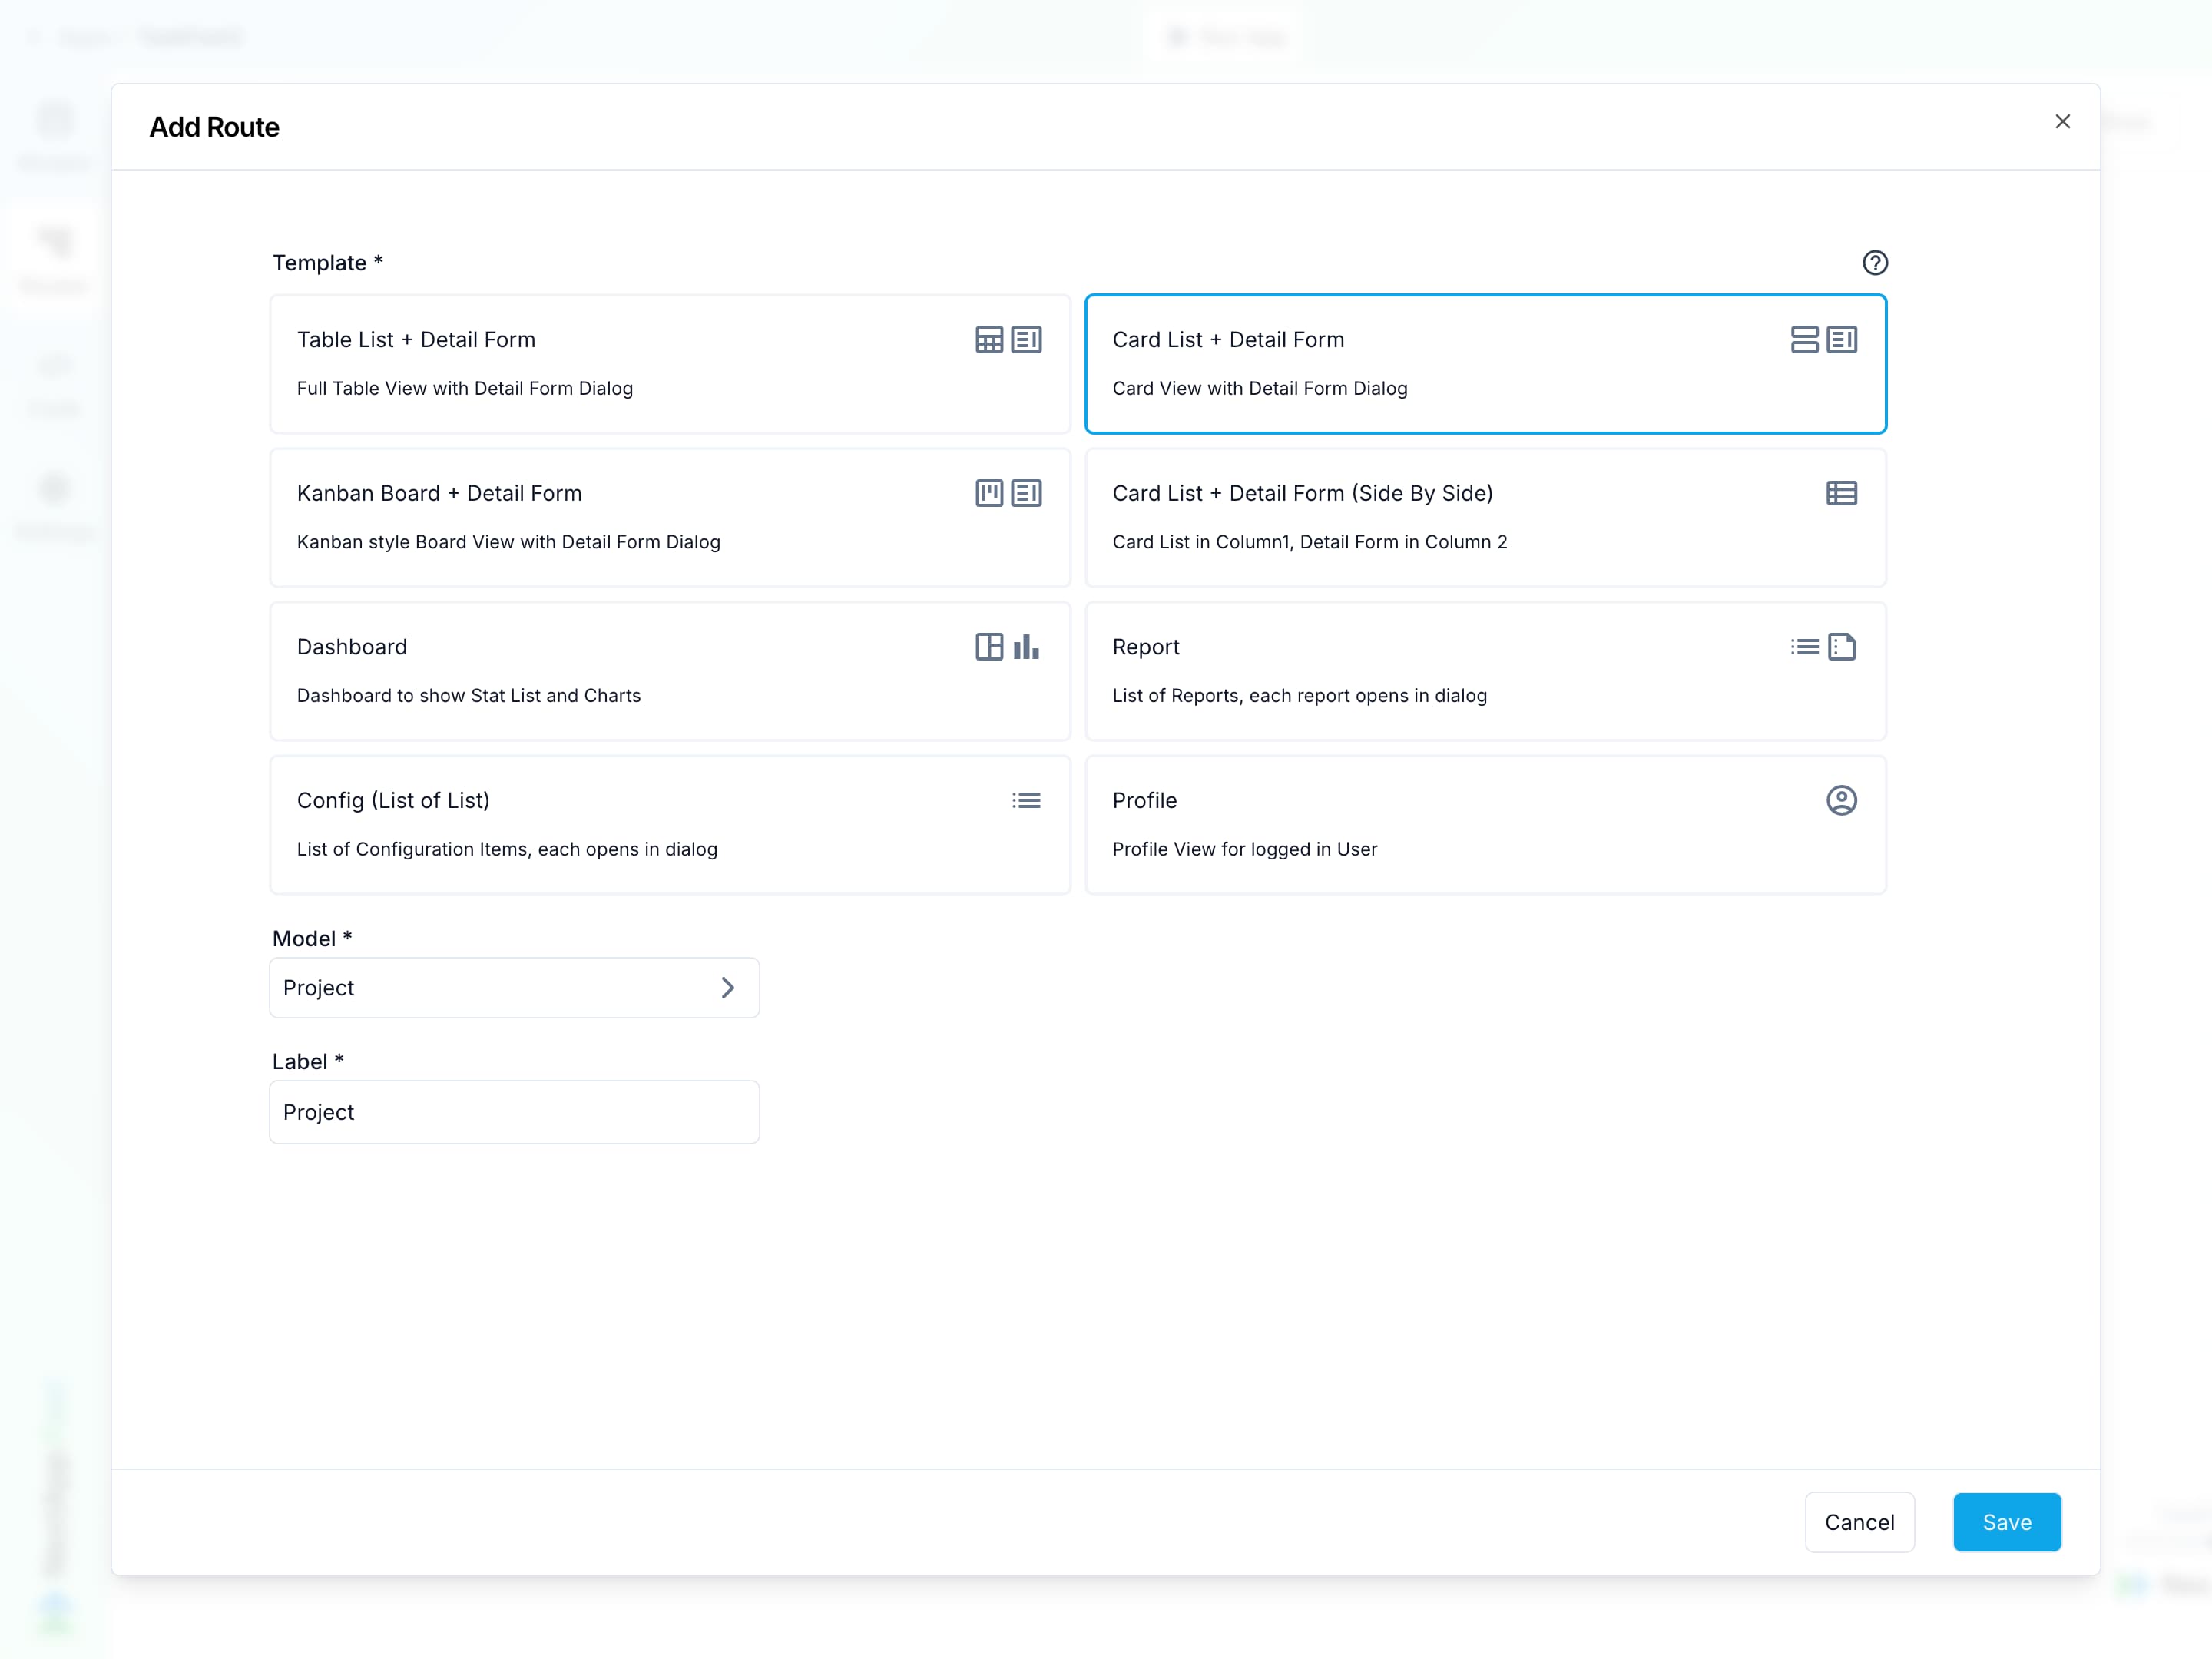
Add Route UI
Project Task Routes UI
-
Click on
Add Routeand enter the following details in the Add Route dialog:- Template:
Card List + Detail Form - Model:
Project
- Template:
-
Click
Saveto add the Project List and Project Form routes. -
Click on the
Project Listroute. In theComponentstab,dragBoard anddropit below Card. In the Add Related Item dialog, selectTaskas the Related Item and clickSave. This will add the Task as a related item (child) that can be navigated from the parent Project. -
Go to the
Task Listroute and click onBoard Groups. In the Properties pane, click theGroup Fieldselector and selectTask Status. This will group the tasks on the kanban board based on their status. -
Configure the group labels and field conditions for each status:
- Open: Group Label = "Open", Condition =
taskStatusequals "Open" - Planned: Group Label = "Planned", Condition =
taskStatusequals "Planned" - In Progress: Group Label = "In Progress", Condition =
taskStatusequals "In Progress" - Done: Group Label = "Done", Condition =
taskStatusequals "Done"
- Open: Group Label = "Open", Condition =
Process:
Clickon untitled and in Properties pane forGroup Label, enterOpen.SelectOpen and in the Properties pane selectGroup For Status. ClickAdd Field ConditionSelectCriteria =Equal to, enterOpenas value. ClickDone. Basically we want to show all tasks that have Status = ‘Open’ under the Open columnClickComponents tab andDragBoard Group anddropit next toOpen.- Repeat above for all group labels
-
Navigate to the
Task Formroute and make the following changes:- Change Task Description to
Multi Line Text(SelectType) HideProject Name (CheckIs Hidden)MoveTask Status next to Task Name- Change Task Status type to
Select List - Configure the Select List Values:
Open,Planned,In Progress, andDone. AlsoCheckNo Empty Options. - Set Is Required to
CheckforTask NameandTask Status
- Change Task Description to
What we did was make Task Name and Task Status required fields, and hide the Project name picker as app knows what project user is on (based on the nested route segments)
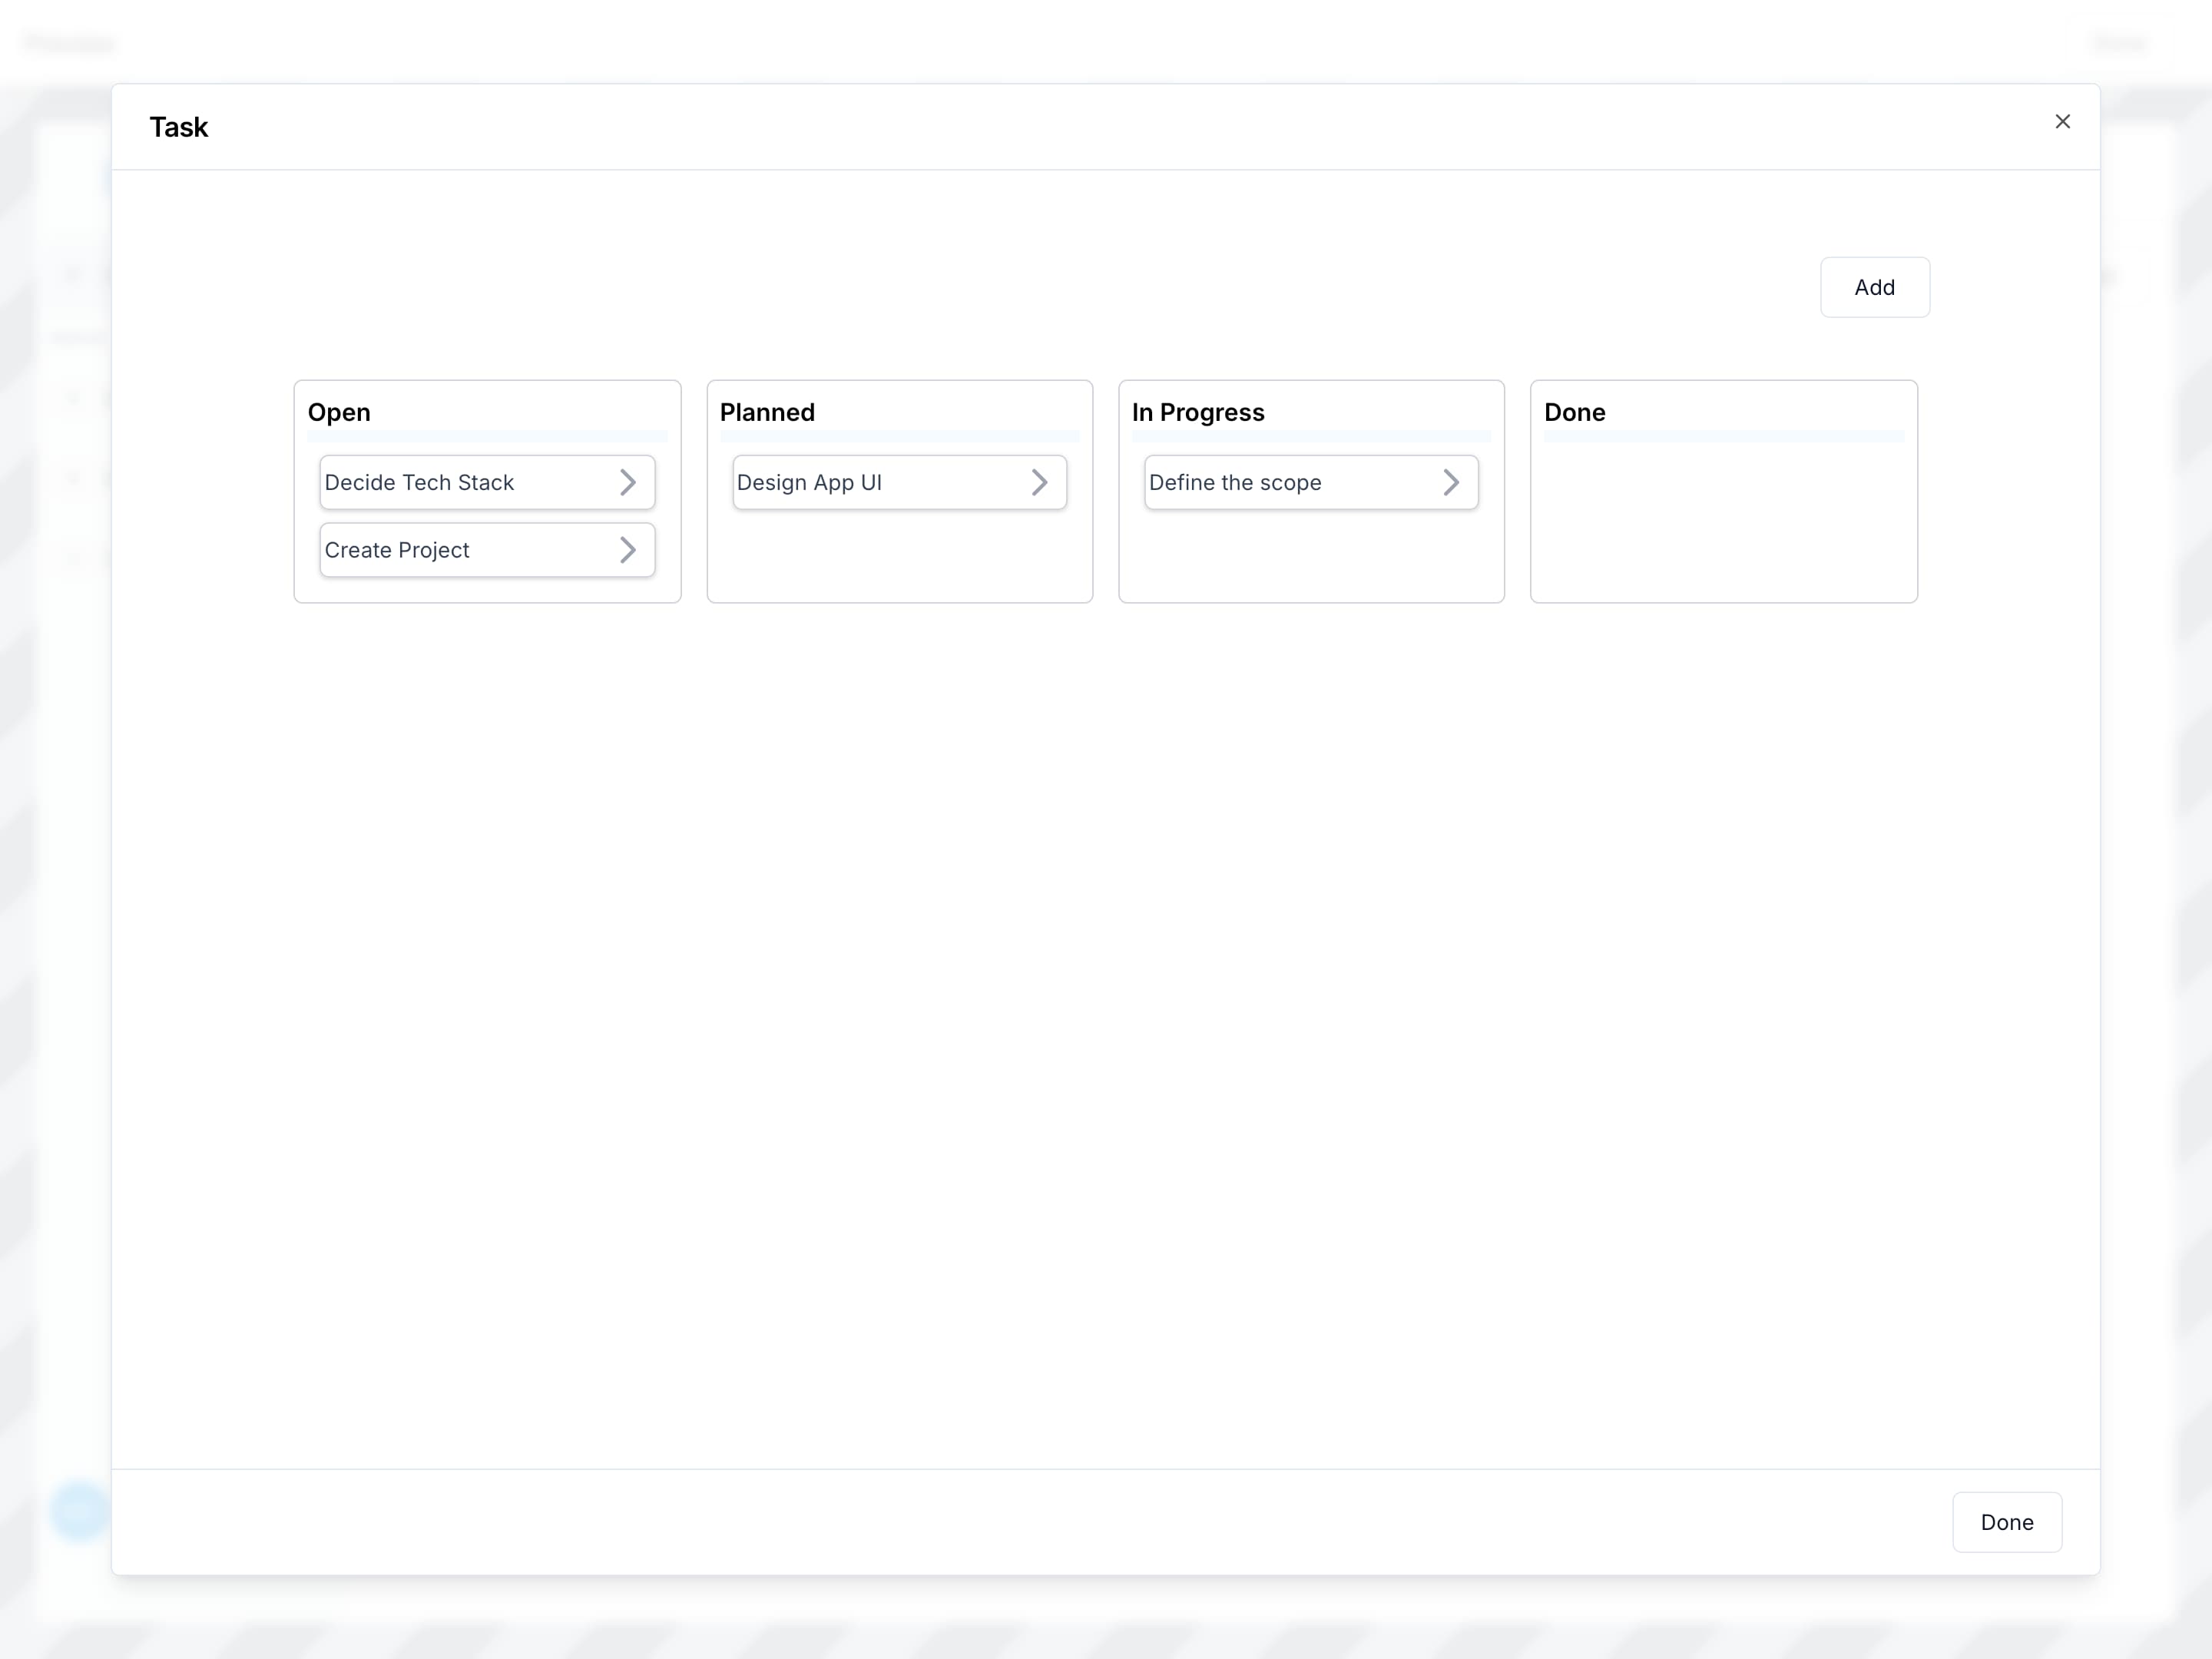
Running the Application
- Go back to the Routes and click
Run App. - In the App Preview, the Project menu will be pre-selected. Click
Addto create a new project called "Expense Manager". - To add tasks, click on the
Task >link. This will bring up the Tasks Kanban board. ClickAddto create a new task with the following details:- Task Name:
Create Project - Task Status:
Open
- Task Name:
ClickAdd to add the task to the project.- Drag the task from the
Opencolumn to thePlannedcolumn to update its status.
Conclusion
In this tutorial, you have learned how to create a simple task management application using the NextAppFast platform. You have defined the models for projects and tasks, configured the routes and user interface, and tested the application by creating a new project and adding tasks. Feel free to further customize and expand the application to suit your specific needs.